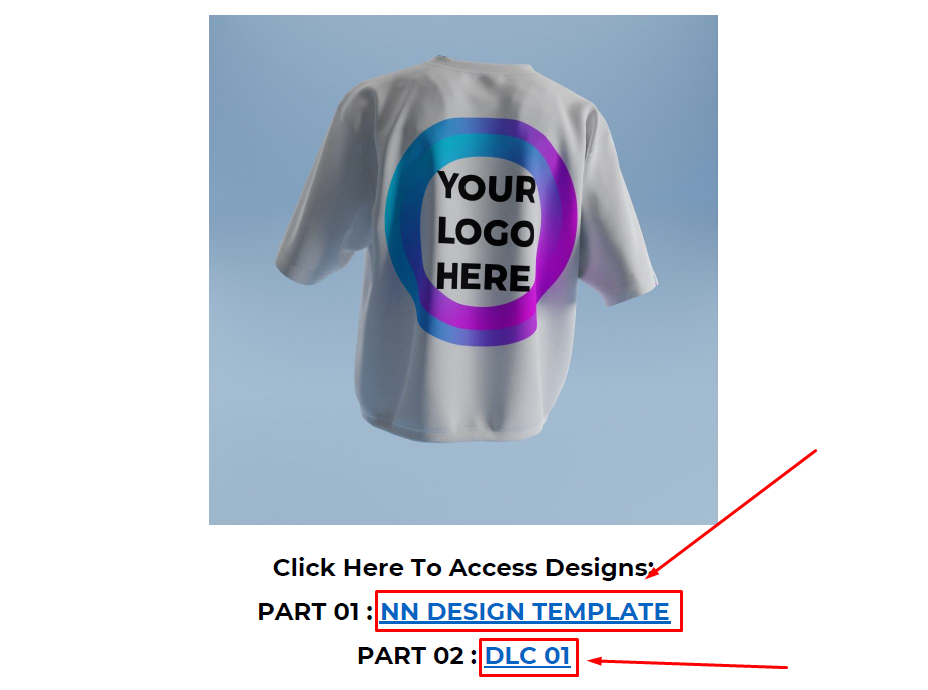
Download the File: Open the PDF file (3D Mockup T-Shirt Tutorial) and locate the download link. Click on it to start the download process.
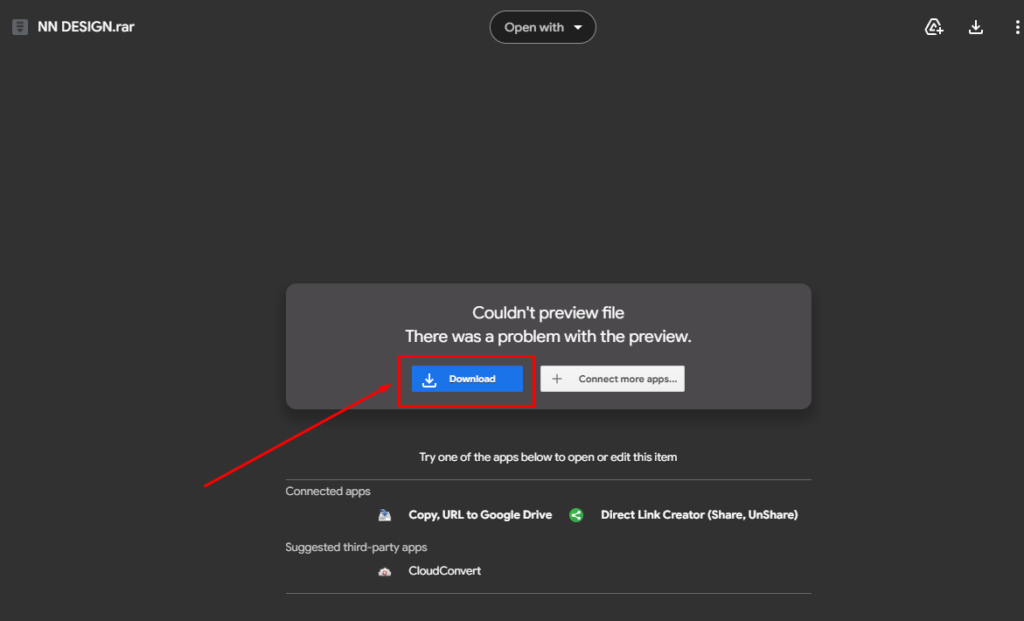
After clicking the download link, you’ll be directed to a webpage. Look for and click the “Download” button on that page.
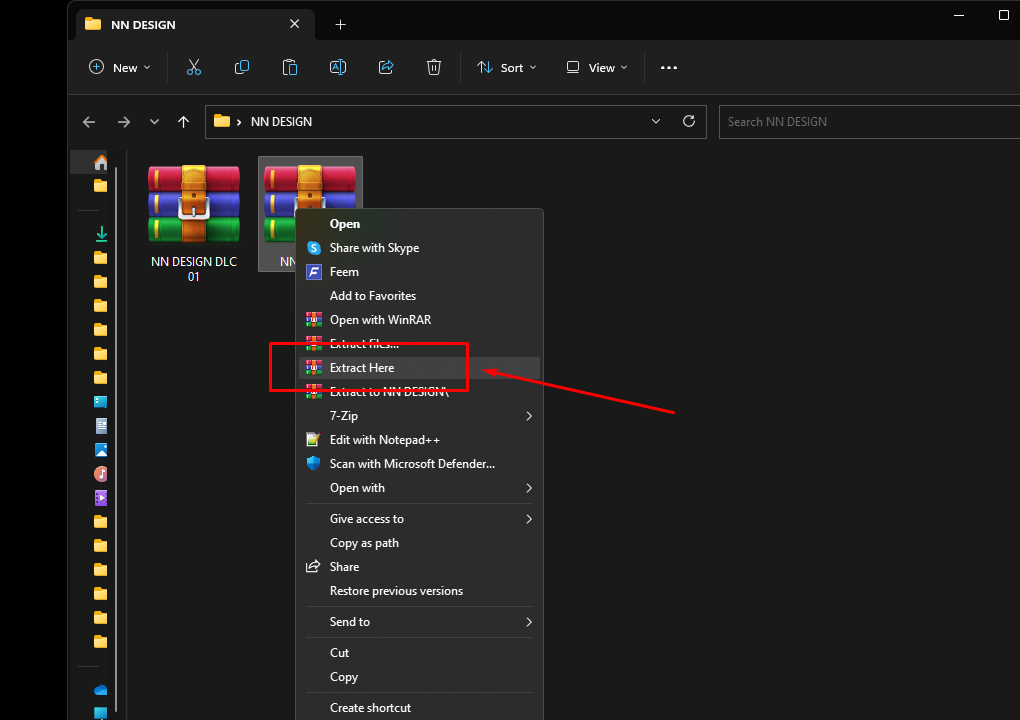
Extract the Files: Once the download is complete, locate the downloaded file. Right-click on it and choose “Extract Here” to extract its contents.
Move the DLC File: Find the DLC file among the extracted items and cut it. Paste it into the main folder where you want to work.
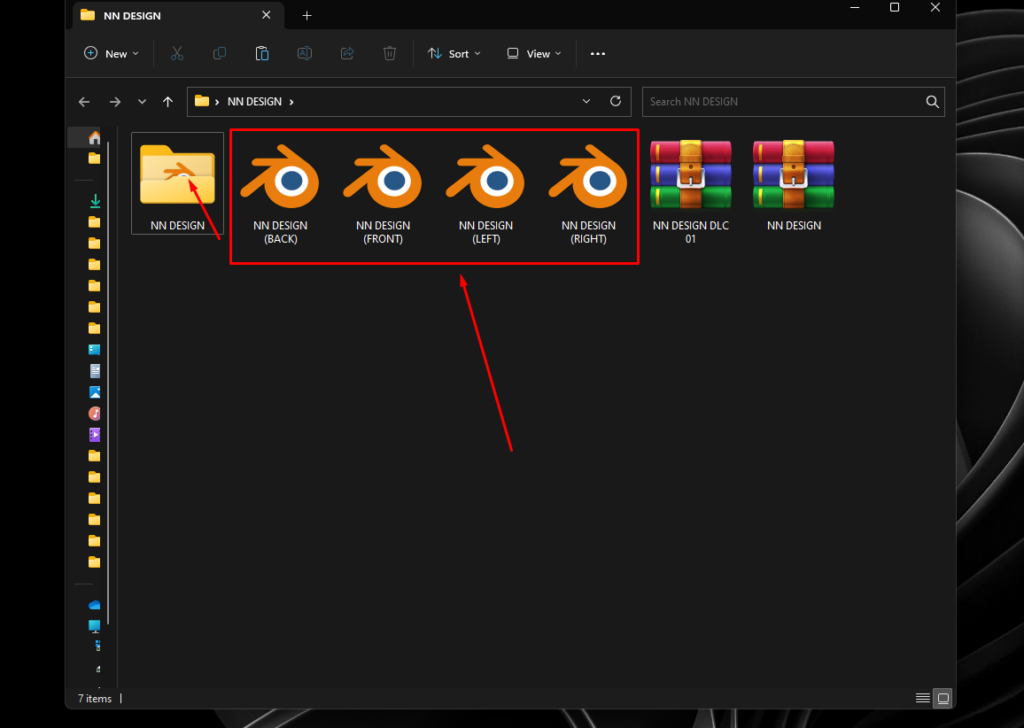
Make sure all the Blender files Locate in The same Folder.
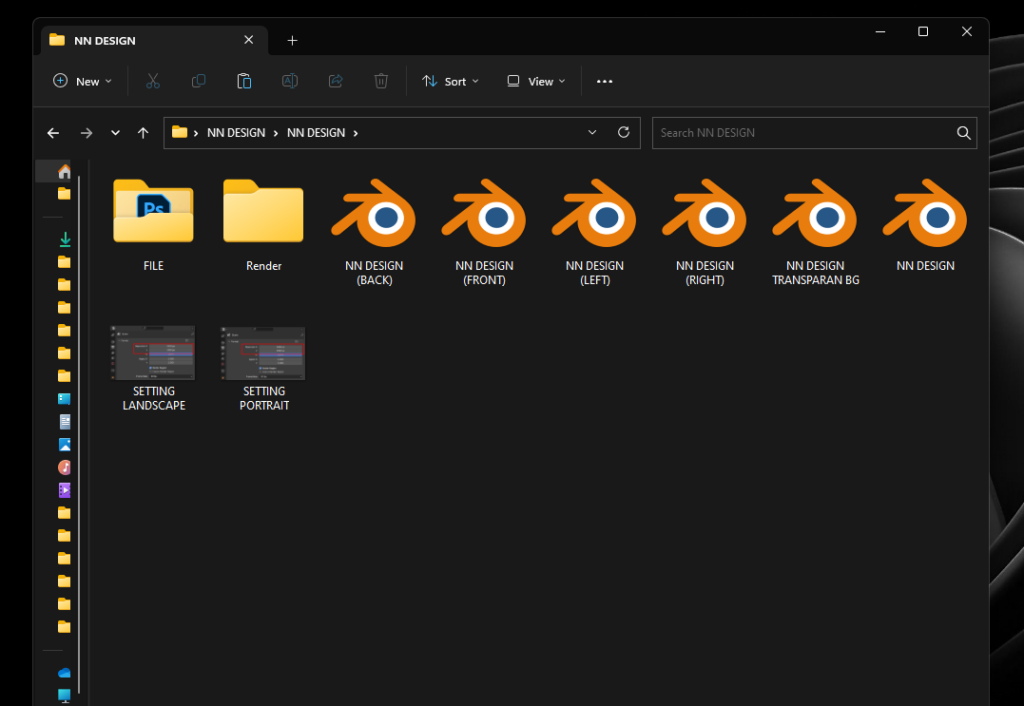
Open Photoshop Template: Navigate to the folder file you’ve just extracted. Open the Photoshop template file.
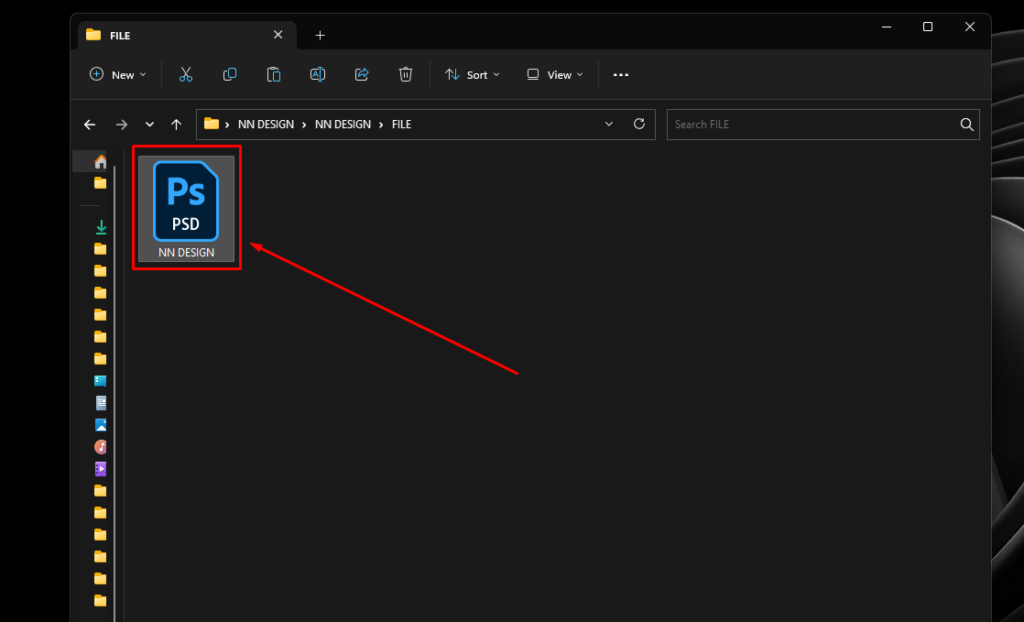
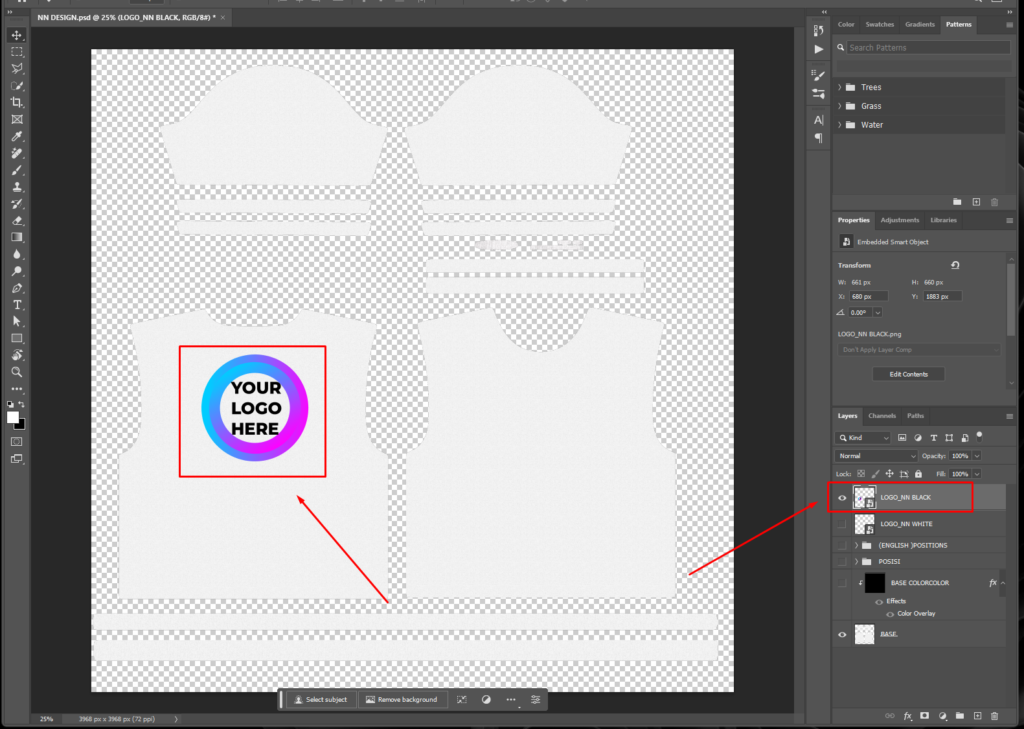
Editing Your Design: You can now start editing your design in Photoshop. Feel free to add logos or make any desired changes.
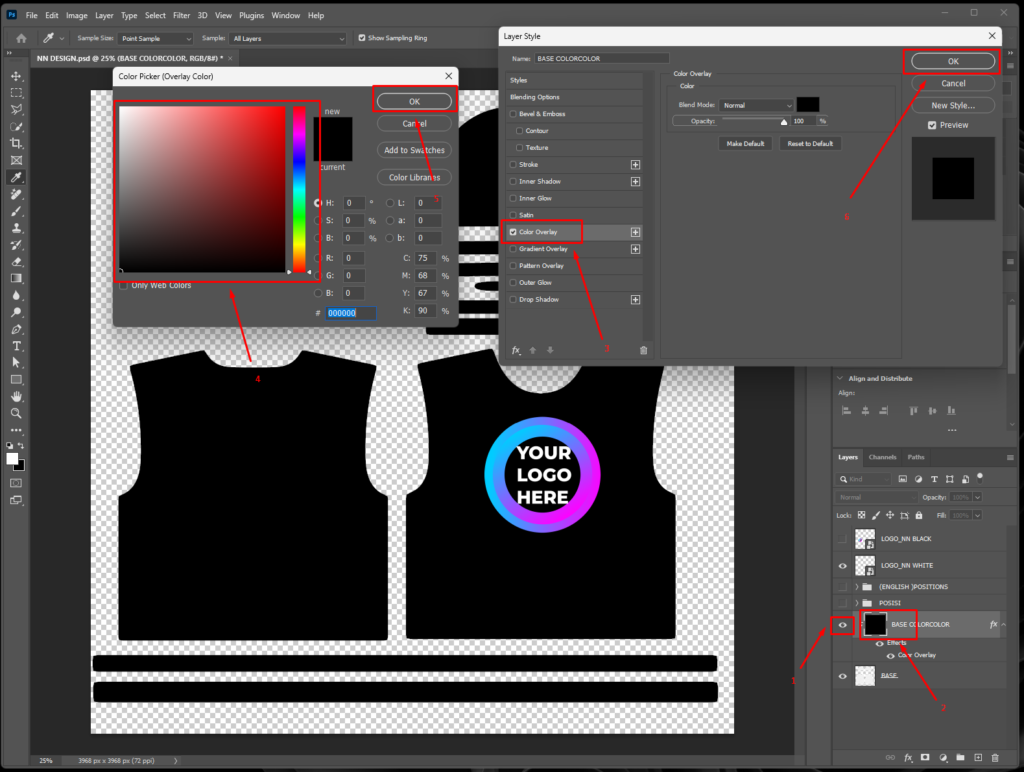
Changing Shirt Base Color: To modify the shirt’s base color, activate the corresponding layer. Double-click the layer, select “Color Overlay,” and choose your desired color. Click “OK” to apply the change.
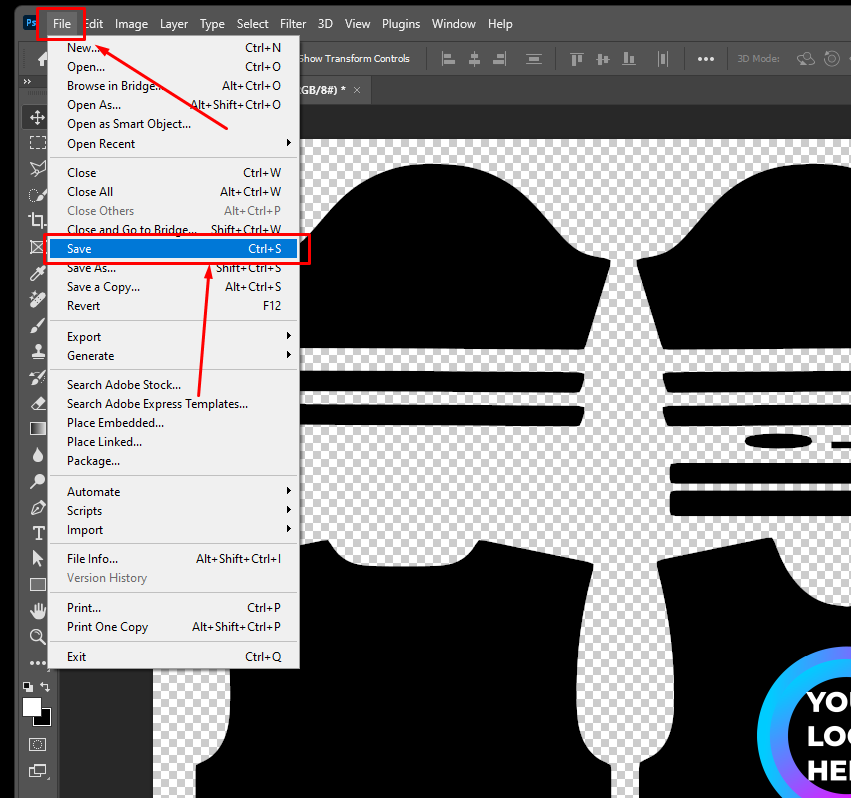
Saving Your Work: After you’ve finished editing, click on “FILE” and then select “SAVE” to save your changes.
Selecting Your Style: Choose the style you want for your design before proceeding further.
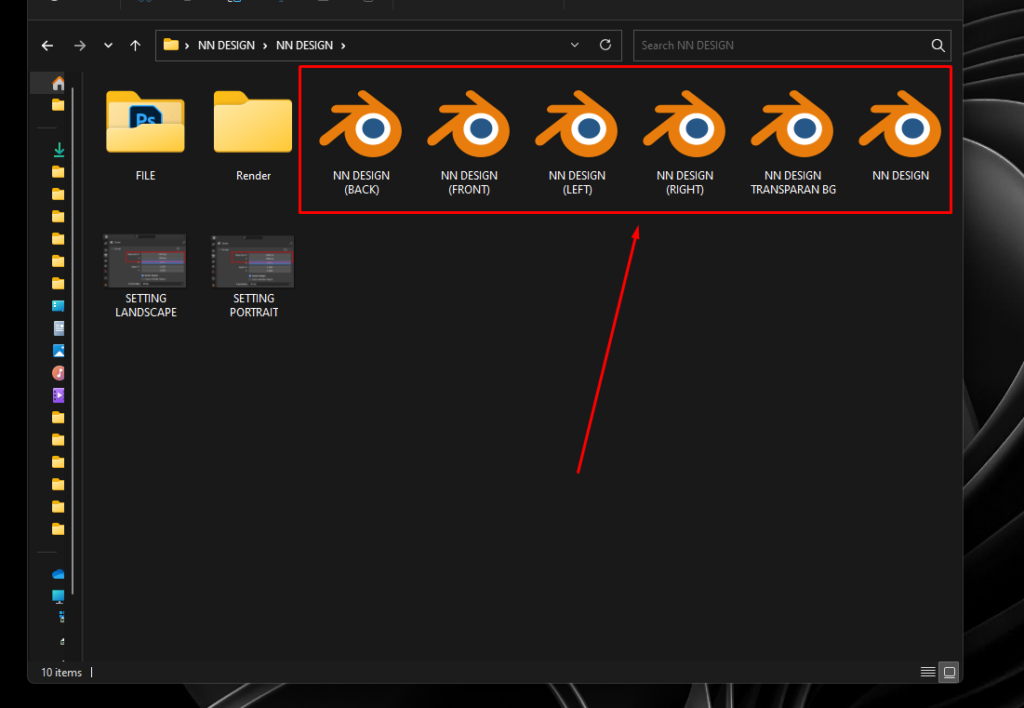
Open Blender Template: Open the Blender template file in your project folder.

Importing Your Edited Image: Click on “Open Image” in Blender. Select the Photoshop file that you edited earlier, and click “Open Image” to import it into Blender.
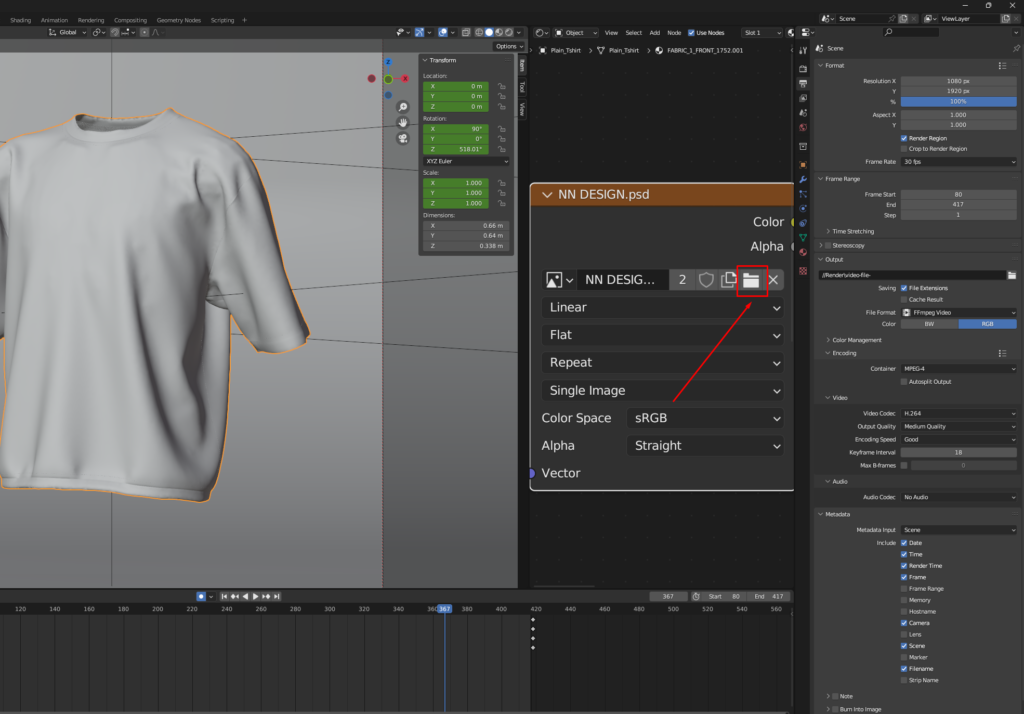
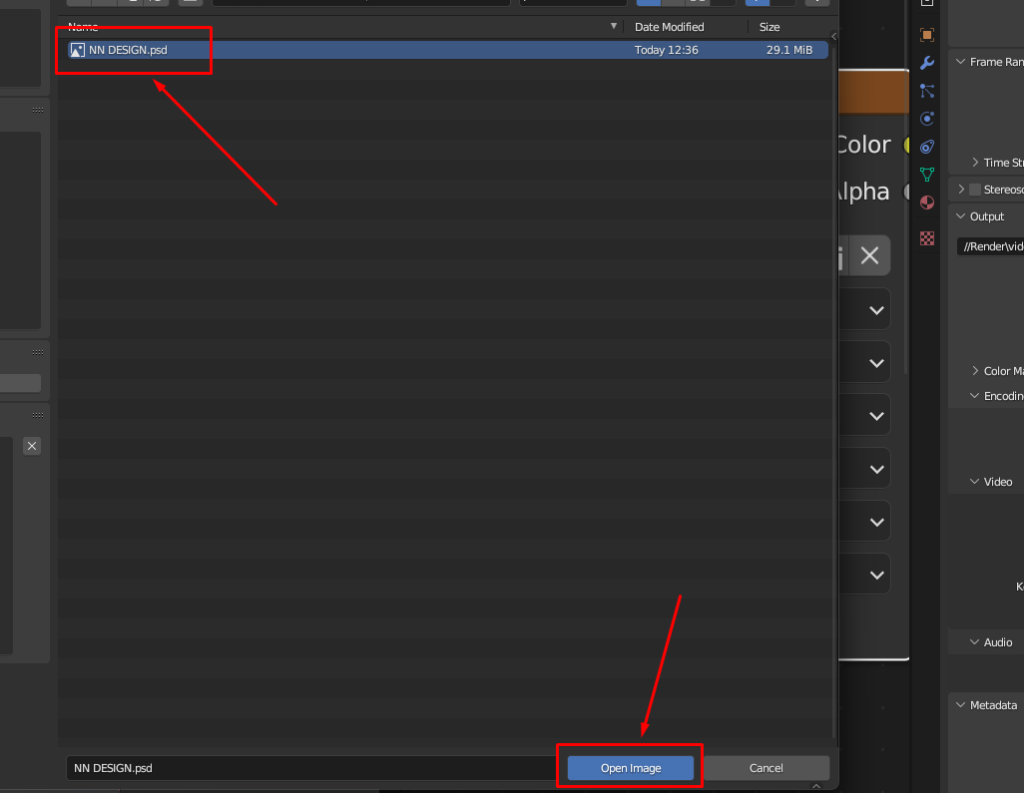
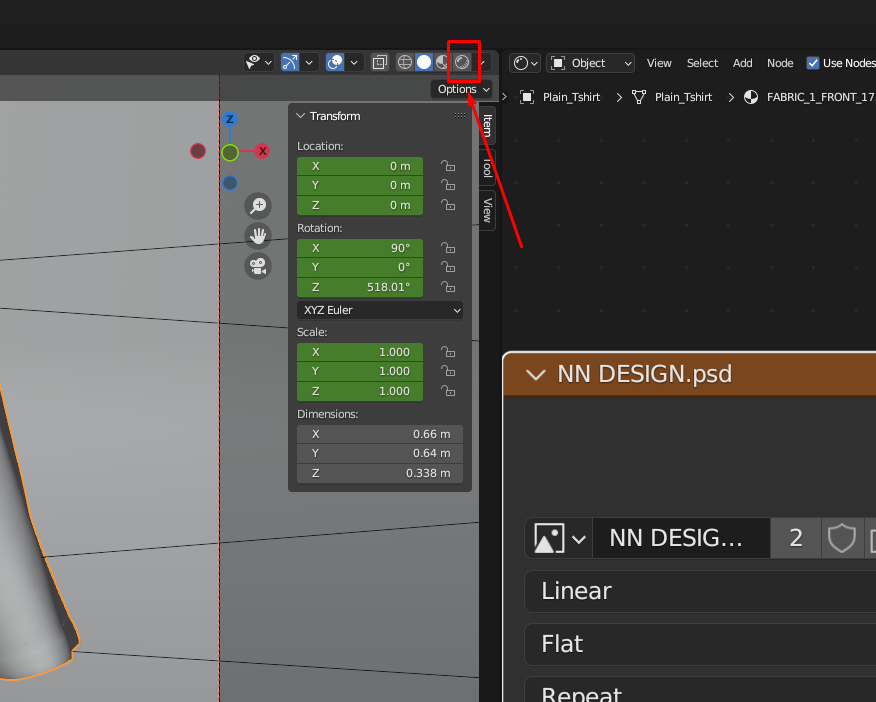
Viewport Shading: To view your project more clearly, click on “Viewport Shading” to adjust the display settings.
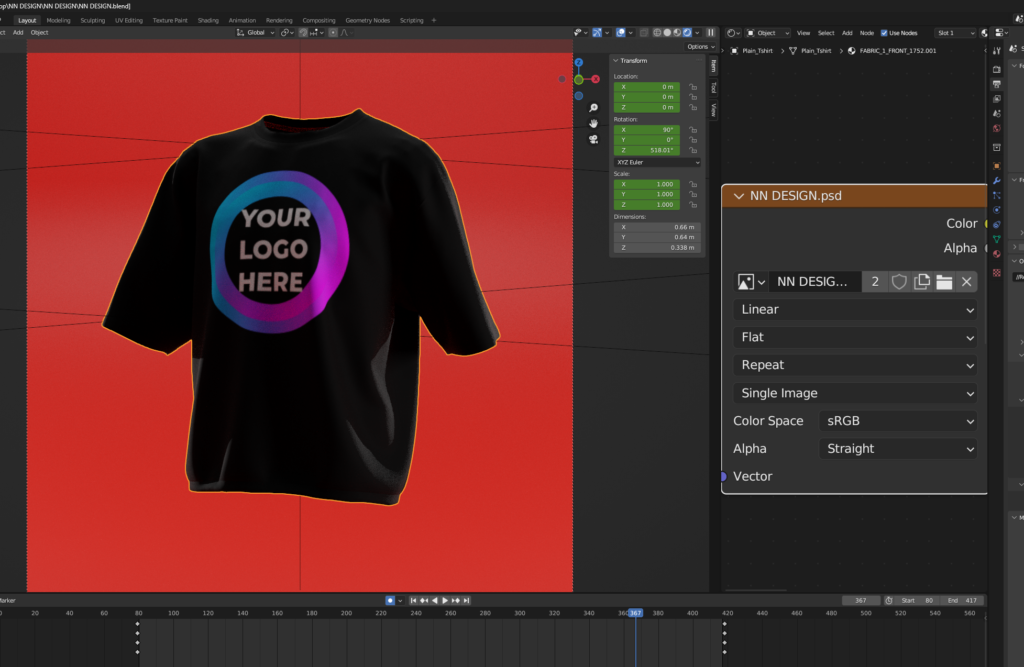
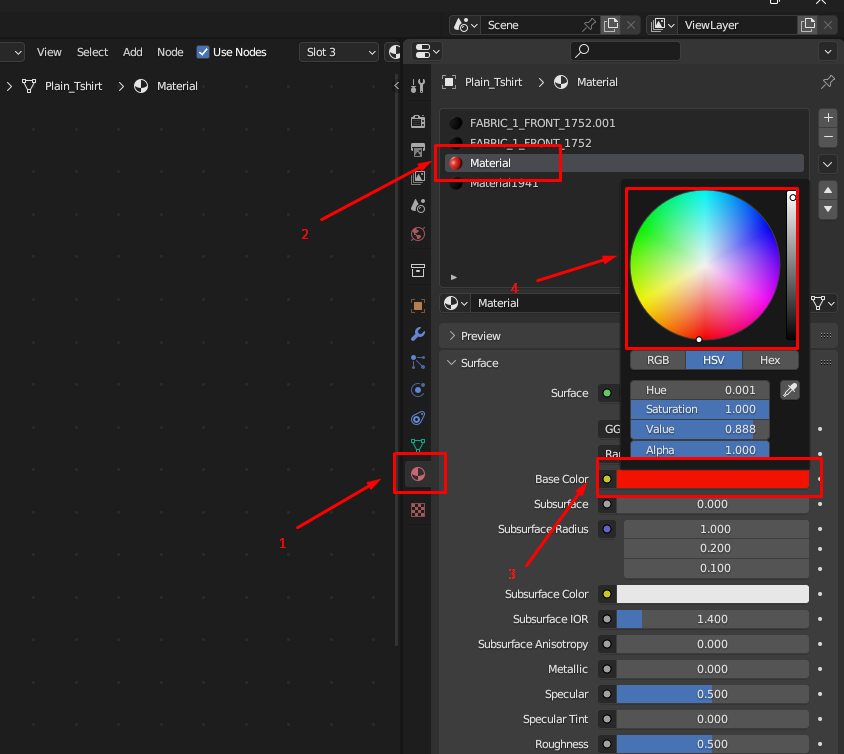
Changing Background Color: Click on the “Material” option and then choose “Base Color” to modify the background color. Select your preferred color.
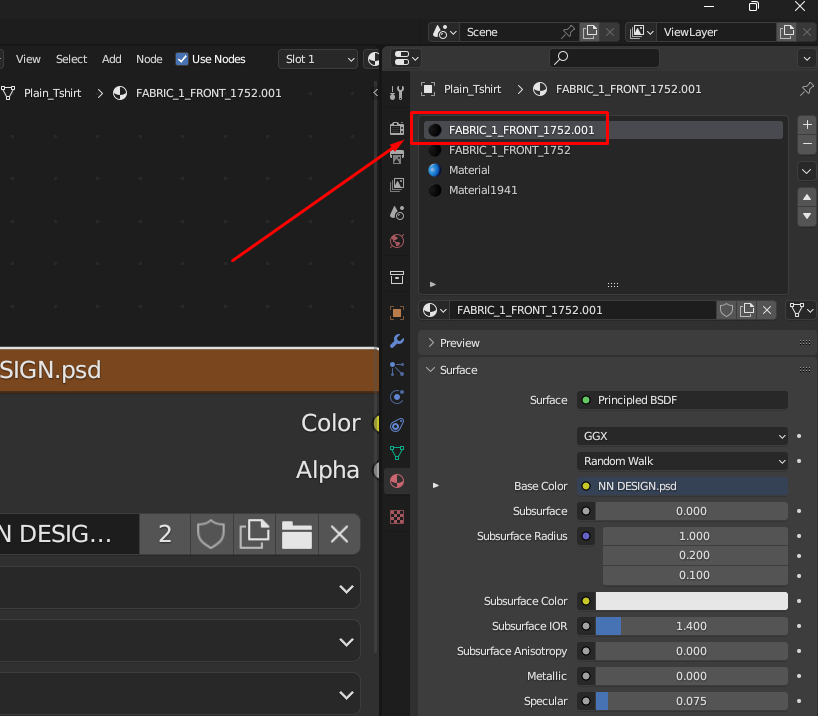
Editing the Fabric: After changing the background, click Material and choose Fabric1 to go back to Normal View.
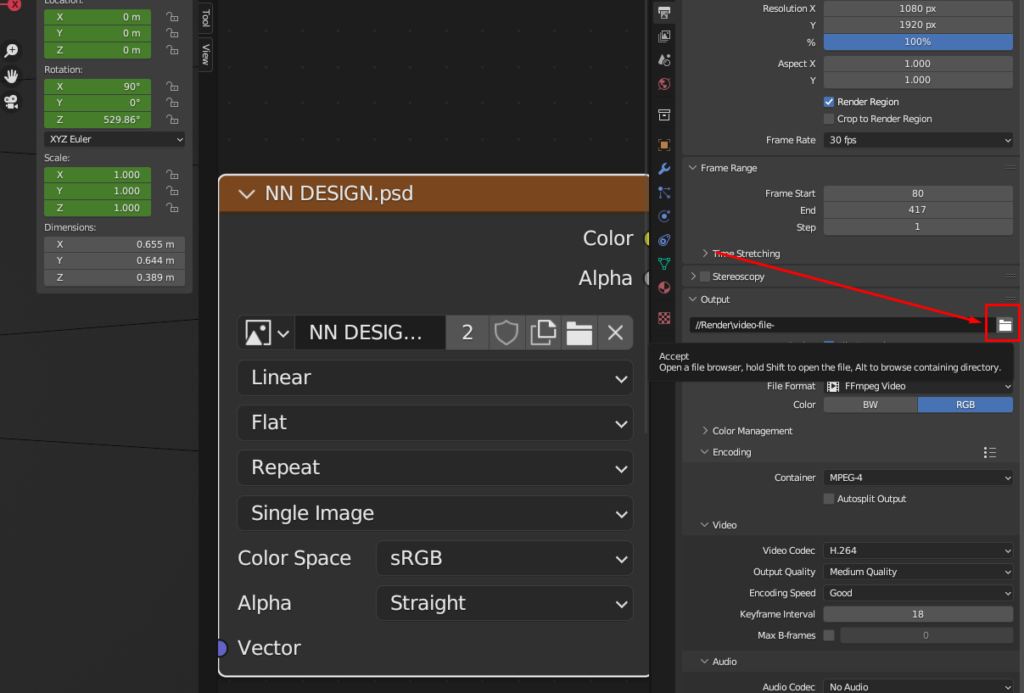
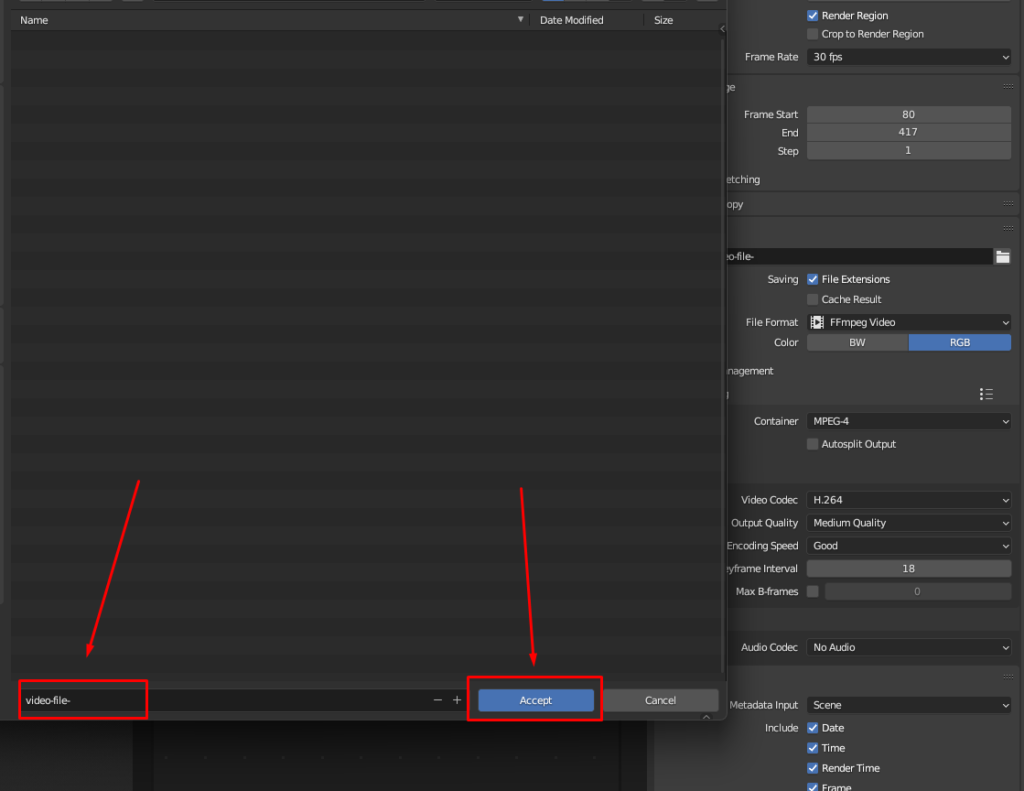
Naming Your File: To change the file name, click on “Output,” type in your desired file name, and then click “Accept.”
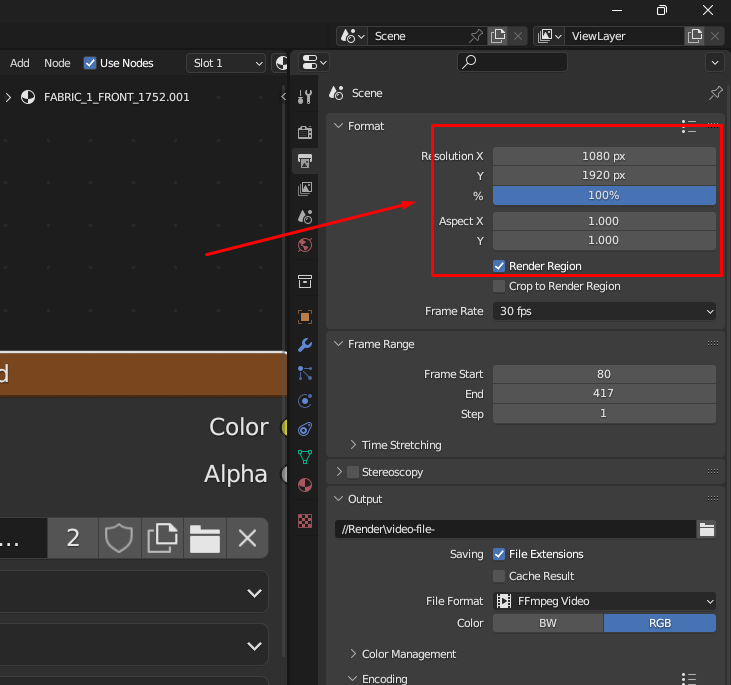
Adjusting Resolution: If needed, modify the resolution by clicking on “Output” and entering your preferred resolution settings.
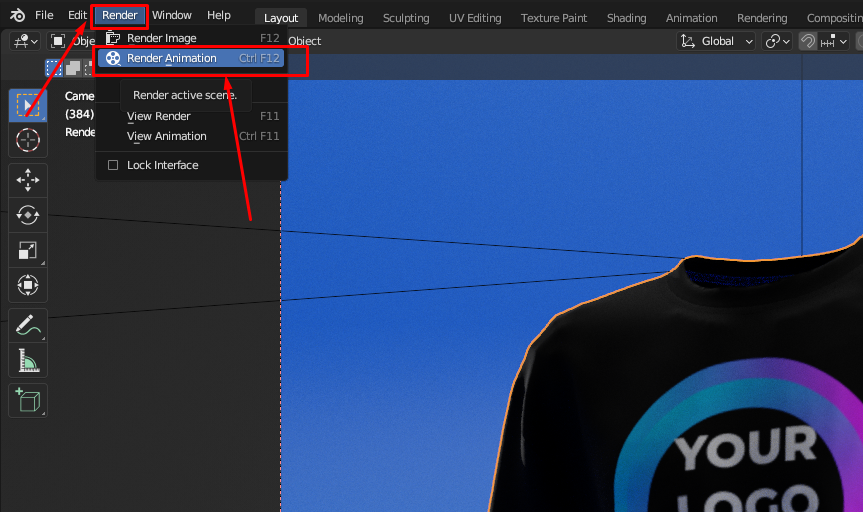
Rendering Your Project: When you’re ready to render your design, click on the render option and choose “RENDER ANIMATION” to start the rendering process.
NOTE :
- If you are Use Transparent Background, Just Skip “Change background Color” Step.
- Do not Missed Place the Files.
- If you are facing any Issues, Just re-Extract all the files, and start over.
- I Personally recommended Render Without (Tansparent) Background. It’s Faster and Easy to Edit on Video Editing App.
- Feel Free to Contact Me or DM me on all My Social Media.
- You can Watch my Youtube Channel.

I need help rendering the video and I have texted you on instagram aswell
ok sure.
Hi , I just bought the package and
1. The graphics shows in reverse on the shirt. How can I correct this?
2. the video remains at 00.00 after renderring and doesn’t play, I guess I am missing the time stretch? Please advise.
@atticalstreetwear
hi…
sorry for your issue.
please try to re-extract all the files.
and make sure you put them in the same folder
Hi,
The print is in reverse on the t-shirt. Why so?
There was no 360 mockup in the package!
Please answer.
hi..
please text me on IG